

Having been a Windows GUI guy for nearly two decades, I am rediscovering the charm of command-line and Windows Batch files to automate repetitive tasks. A few weeks back, I had shared a batch file to backup my WordPress blog running in Windows.
In this post, I am sharing a simple batch file to resize all the images in a folder using the powerful image manipulation library called ImageMagick. Earlier, I was using Adobe Photoshop Elements’ “Process Multiple Files” applet for this purpose.
ImageMagick is open-source and free! An awesome tool chest that offers numerous image editing functions, and, it runs on Linux, Windows, Mac OS X, Android and iOS. You can download and install from here, or use a package manager like ChocolateY for Windows (like I have done below) to install ImageMagick package.
choco install imagemagick.tool -y
In the following batch file, I have hard-coded the image size (Width and the Height) and the image quality (the JPEG compression percentage), but you can easily make them configurable too.
@echo off
REM https://docs.microsoft.com/en-us/windows-server/administration/windows-commands/forfiles

mkdir output

FOR %%y IN (%1) DO (
    @echo Converting %%y to low\%%y
    C:\ProgramData\chocolatey\lib\imagemagick.tool\tools\convert.exe -auto-level -strip -resize 2000 -quality %80 "%%y" "output\%%y"
)
You call the above batch file and pass the parameter of the folder (as seen in the bottom of this post) that has all the images that you want to be converted, you may also specify the wildcards that are supported by DIR command.
To keep the batch file simple, the image size (Width and the Height) and the image quality (the JPEG compression percentage) are hard-coded. For the same reason, the script creates a folder by name “output” inside the current folder to store all the converted (output) files.
The -strip parameter to convert.exe removes all the image meta-information (EXIF) that will help to protect your privacy. Check the full list of the parameters supported by convert.exe to discover new capabilities including watermarking with a text or image, and, many more possibilities.
Remember, to change the path to the ImageMagick executables, to match the installation in your PC.
The below screenshot shows the usage of the batch file and the output:
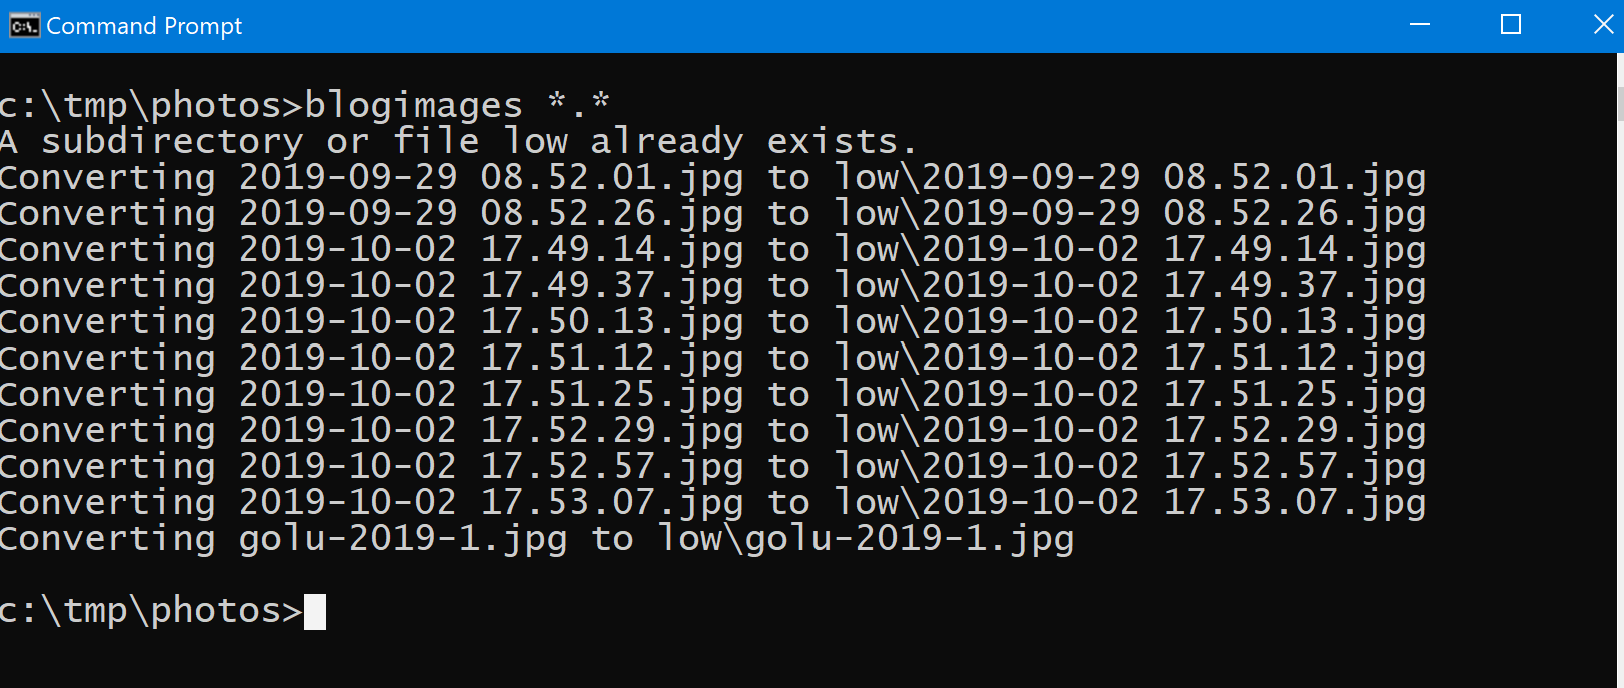
The output of the batch file that converts all the images in a folder
P.S.: ImageMagick’s convert.exe does support wildcards directly, but that usage was not easy for my use case, so I went with writing the batch file.
Comments