I was telling someone yesterday about why I love the new messenger control. This is the control that you see on the left-hand side of this page titled “Chat with me” that allows an anonymous visitor to the page to chat with me in real time when I am logged in to Live Messenger.
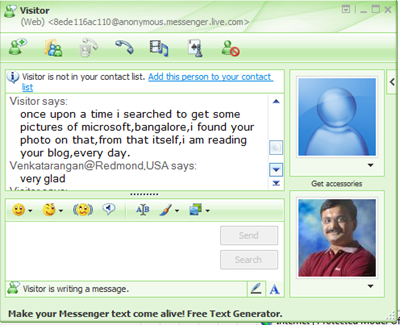
I love the opportunity this simple control gives me to interact with visitors around the world. I am sure they are finding this easy to use this, rather than writing a comment and it also gives them instant gratification. Today I was having an interesting conversation with a Facility Manager from Saudi Arabia on how he came across my blog (actual chat snippet below):

Visitor to Venkatarangan Blog on how he discovered the blog
What I like most is the convenience of using and the control I get with this service. I don’t need to sign in to yet another site or install a client application for being available for chatting. The only thing I need to do is to be signed in to my regular Live Messenger. And including this on the blog page couldn’t be easier – other than the Microsoft style of a plethora of different sites you need to go before you understand it.
To include this control on your page, there are three steps.
Step 1: Enable Permission in Messenger settings page to “Show your Messenger Status on the Web”
Step 2: Click on the “Create HTML” on the left-hand navigation on the same page. In the page select the style of the control you want to display in your page
Step 3: Copy the HTML at the bottom of the page and paste it into an appropriate area in your blog page.
For more details refer to dev.live.com/messenger. But please spare yourself by not starting with this page, it takes you to a complex looking MSDN page which finally redirects you to these 3 simple steps I have said above.


I think that can save a lot of time, and people would be satisfied with the attention given.
I was told about this but I wassn’t sure it worked. Now with your comment I see it works well.
Looks similar to yahoo messenger but anybody can try it so we’ll see the difference. This is good information. Keep up the good work!
Reference: Very helpful, thanks!!
hello sir,
Is there any possibilities to implement same thing with yahoo messenger? Thanks.