


The other day, a friend asked for help on how to create and manage digital flash cards. During his ideation phase for writing a book he is in the habit of writing each idea in a flash card, then laying out all the cards in the floor, to rearranging them, throwing-away ideas he didn’t like or to rewriting a few cards. While this has been super useful to him, it was difficult to handle physical flash cards, and was a lot of paper wastage. He wanted a simple app to do this. Yes, he had tried a few mind-mapping and specialised software, but like them, as they required relearning or were difficult, he will not be using them every day to justify the investment.
I suggested he try out Microsoft PowerPoint (or) Google Slides to achieve what he wanted easily.

Step 1. Microsoft PowerPoint – Create a new slide, select layout->Title Slide. Enter the title of the chapter you want. Keep repeating for every chapter.
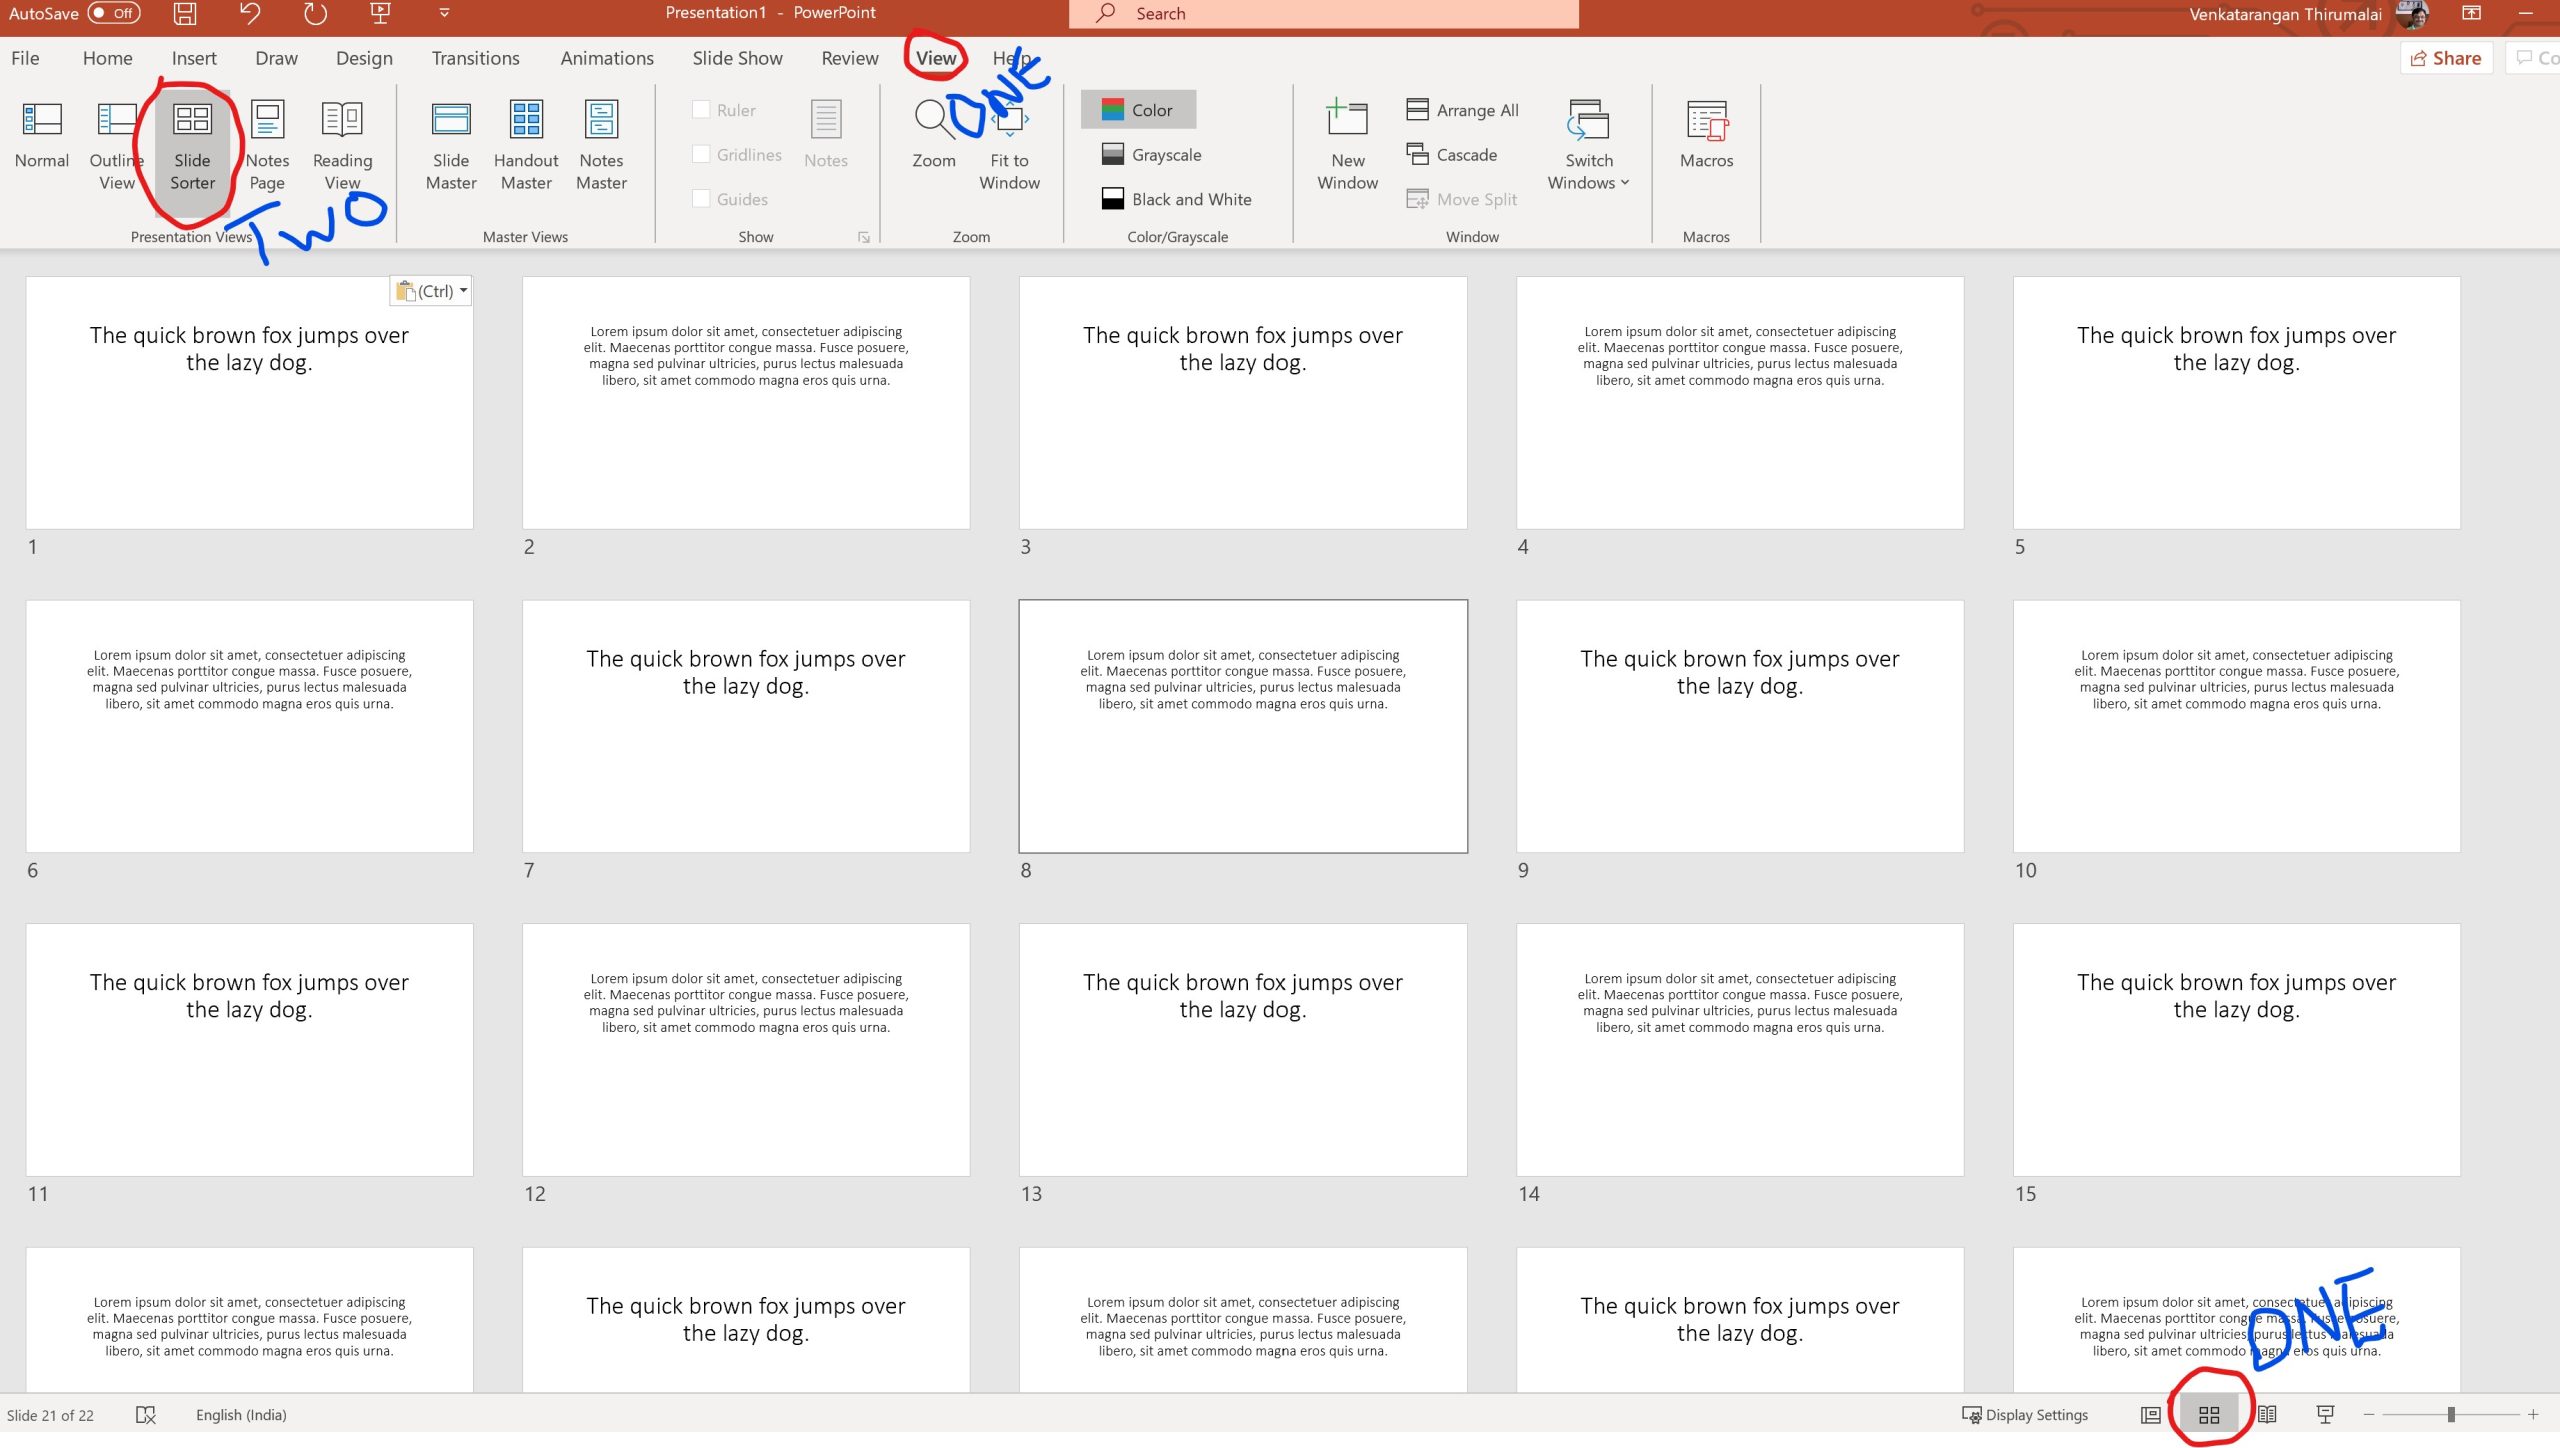
Step 2. Microsoft PowerPoint – Select the Slider Sorter view. There are two ways to do this. Either press the button that’s looking like four squares in the bottom right (or) View->Slide Sorter from the Top Menu.
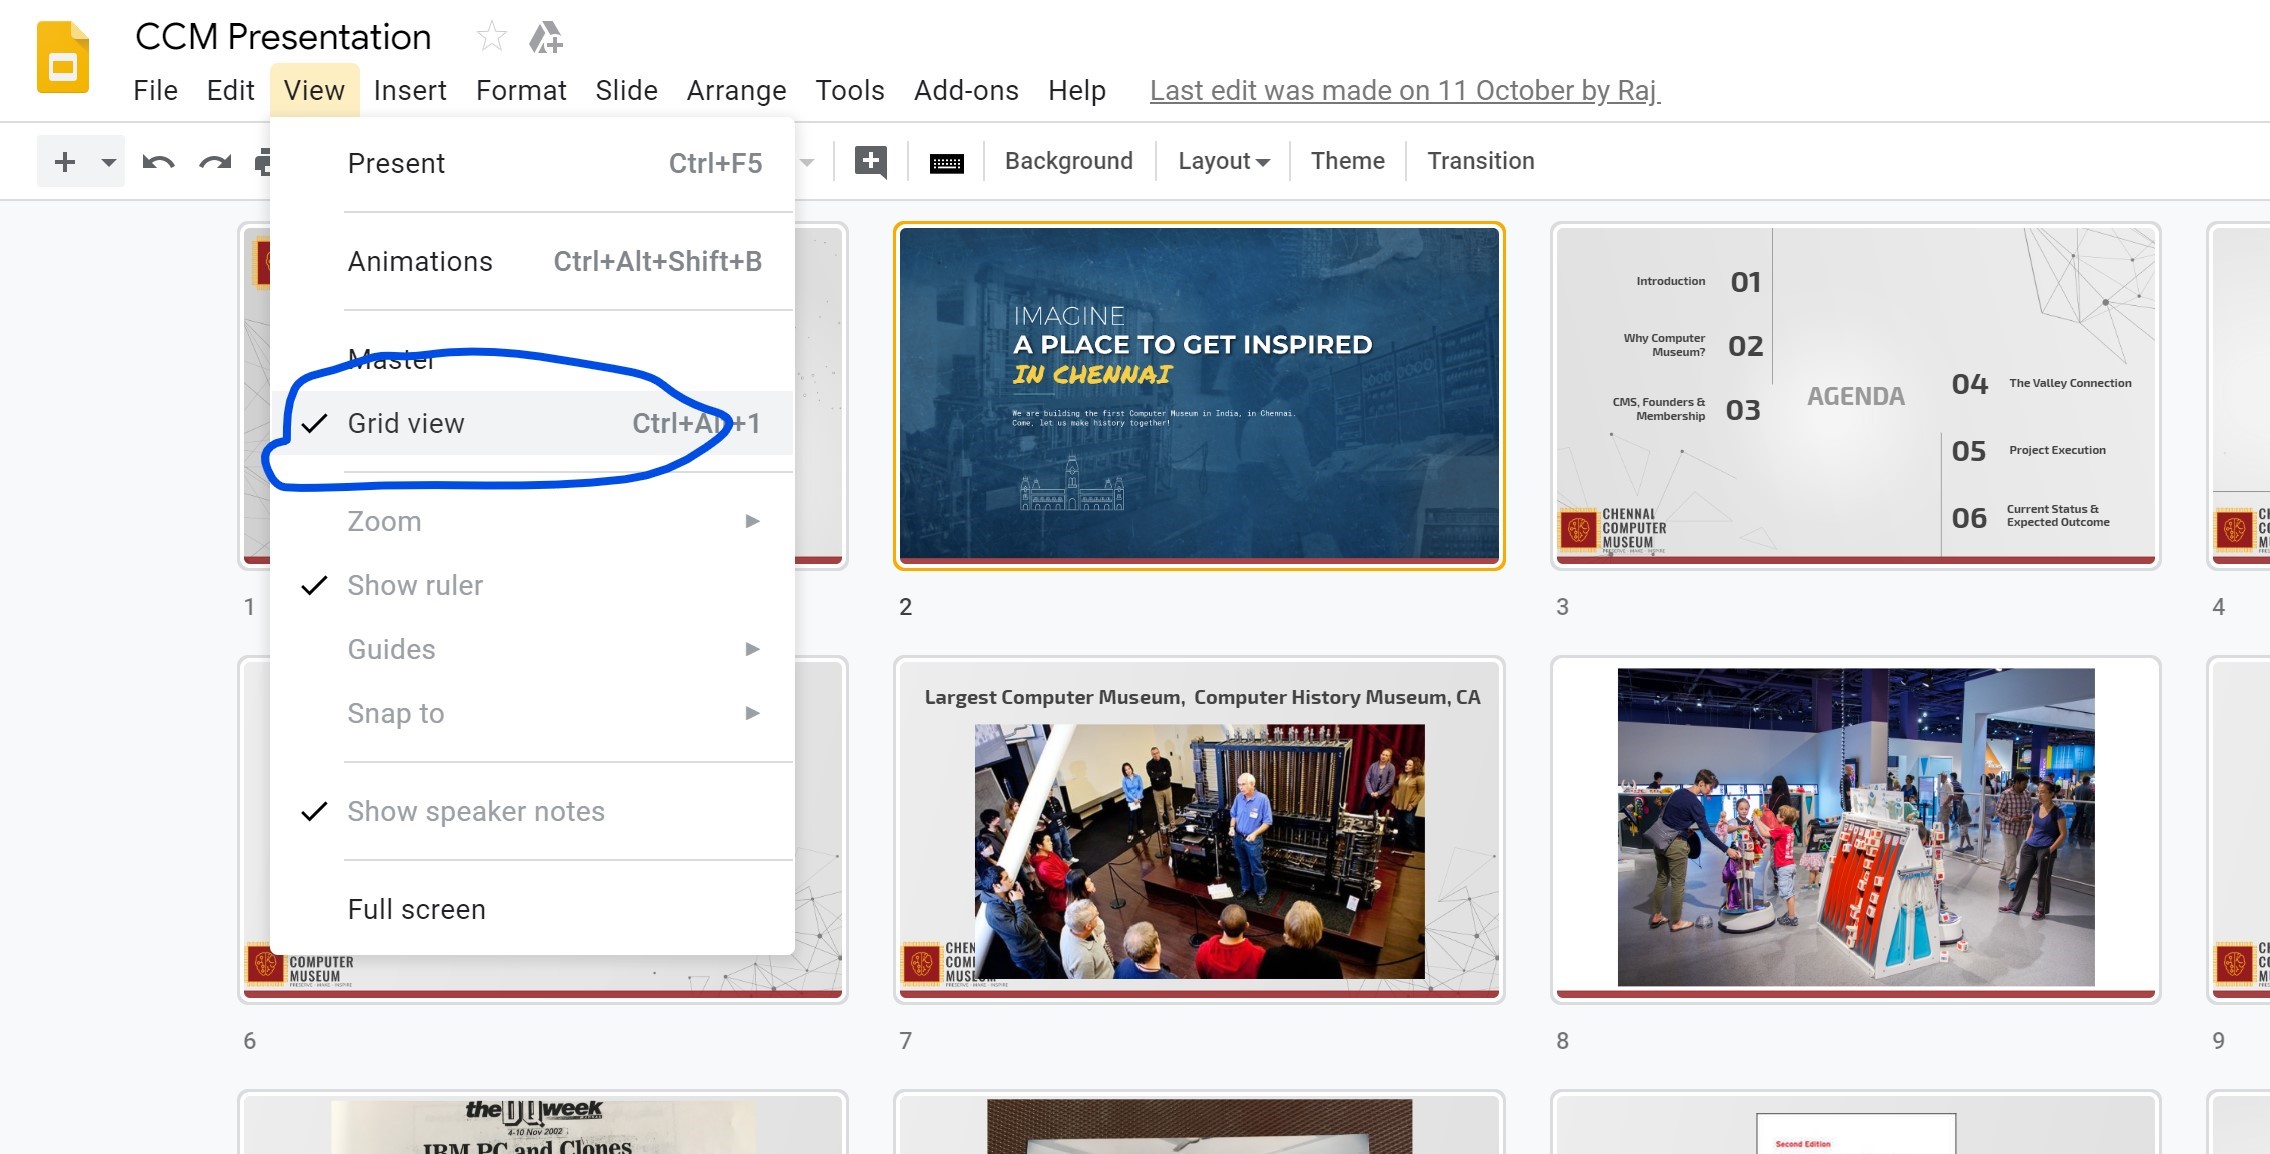
Google Slides has a similar feature. Select View->Grid View from the menu.
Discover more from Venkatarangan blog
Subscribe to get the latest posts to your email.
Comments