

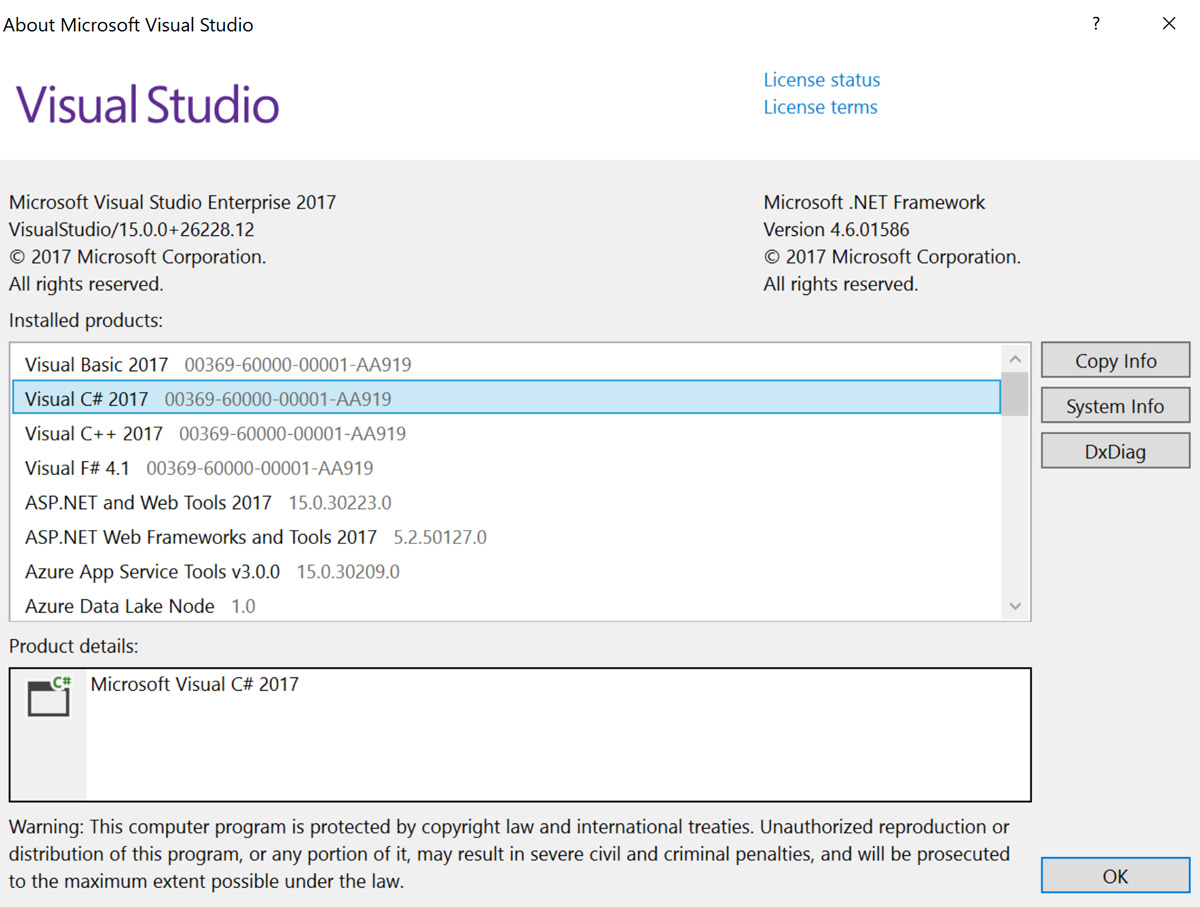
Having got the newly released “Visual Studio 2017” installed in my PC, I decided to try writing cross-platform .NET Core Apps. I started with the simplest of apps, to write a console app and see how it goes. To follow along you can download Visual Studio Community edition, which is free or the commercial versions. You can refer to this Microsoft doc titled “Building a C# Hello World Application with .NET Core with Visual Studio 2017” for additional information on what I am doing here.
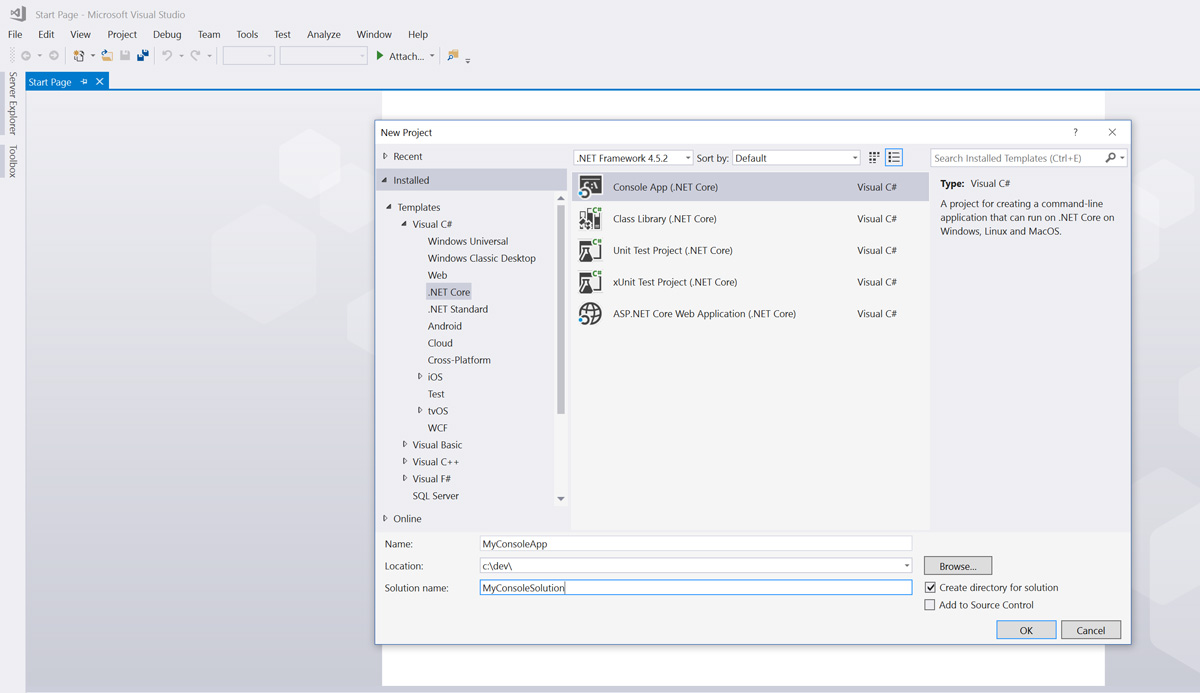
Step 1: Create a new Console App (.NET Core). Ignore the .NET Framework drop-down on top

Step 2: Edit the Program.CS to write a line and wait for a keypress
using System;

namespace MyConsoleApp
{
    class Program
    {
        static void Main(string[] args)
        {
            Console.WriteLine("Cross Platform App made using .NET Core");
            Console.Read();
        }
    }
}
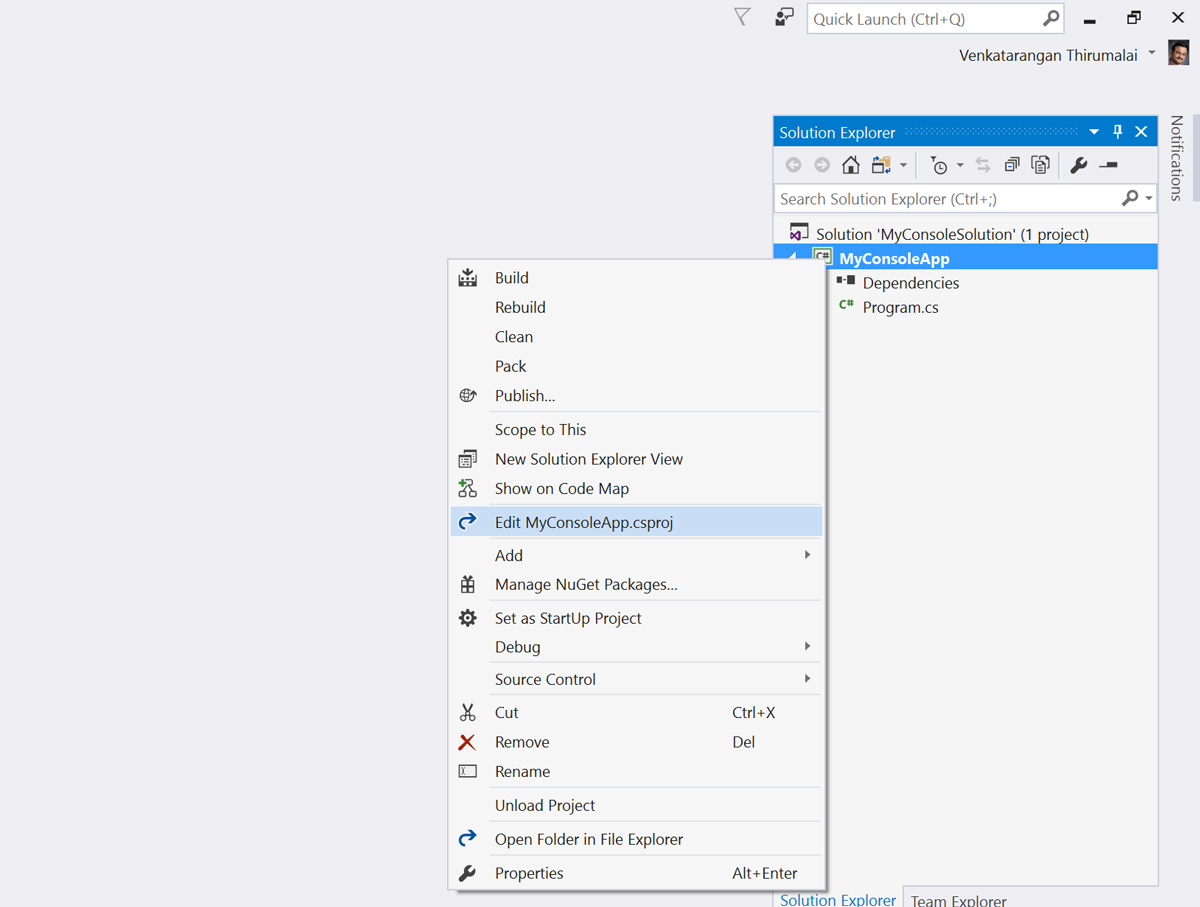
The next step is IMPORTANT. You need to access the .csproj file by right-clicking on the project in solution explorer and select “Edit MyConsoleApp.csproj”. CSProj is a new file type in released .NET Core and VS 2017, in demos made for Visual Studio 2015 or beta releases of .NET Core you would’ve put these settings in Project.JSON file.
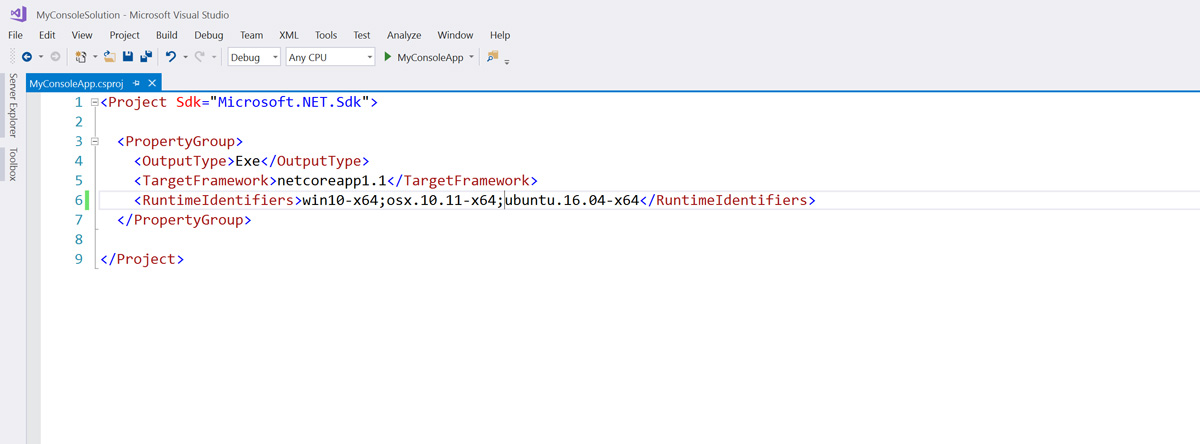
Step 3: Access .CSPROJ file where Platform settings reside
There are two types .NET Core Applications Deployment – Framework-dependent deployments (FDD) and Self-contained deployments (SCD). In this example, I am going with SCD so that I can deploy and run the app on machines which don’t have .NET Core installed. In the output package, we will create, the app will include the necessary .NET Core Runtime needed to run on the target platform, whether it is Windows or Mac OS X or Ubuntu Linux.
Step 4: Insert the tag to specify the platforms you want to target
Create a tag under the section in your csproj file that defines the platforms your app targets, and specify the runtime identifier of each platform that you target. For a full list of .NET Core Runtime IDentifier (RID) is here.
<Project Sdk="Microsoft.NET.Sdk">

  <PropertyGroup>
    <OutputType>Exe</OutputType>
    <TargetFramework>netcoreapp1.1</TargetFramework>
    <RuntimeIdentifiers>win10-x64;osx.10.11-x64;ubuntu.16.04-x64</RuntimeIdentifiers>
  </PropertyGroup>

</Project>
You can try “running” the app once to ensure everything is working fine. Then Right-Click on the Project to select Publish.

Step 5: Publish your project
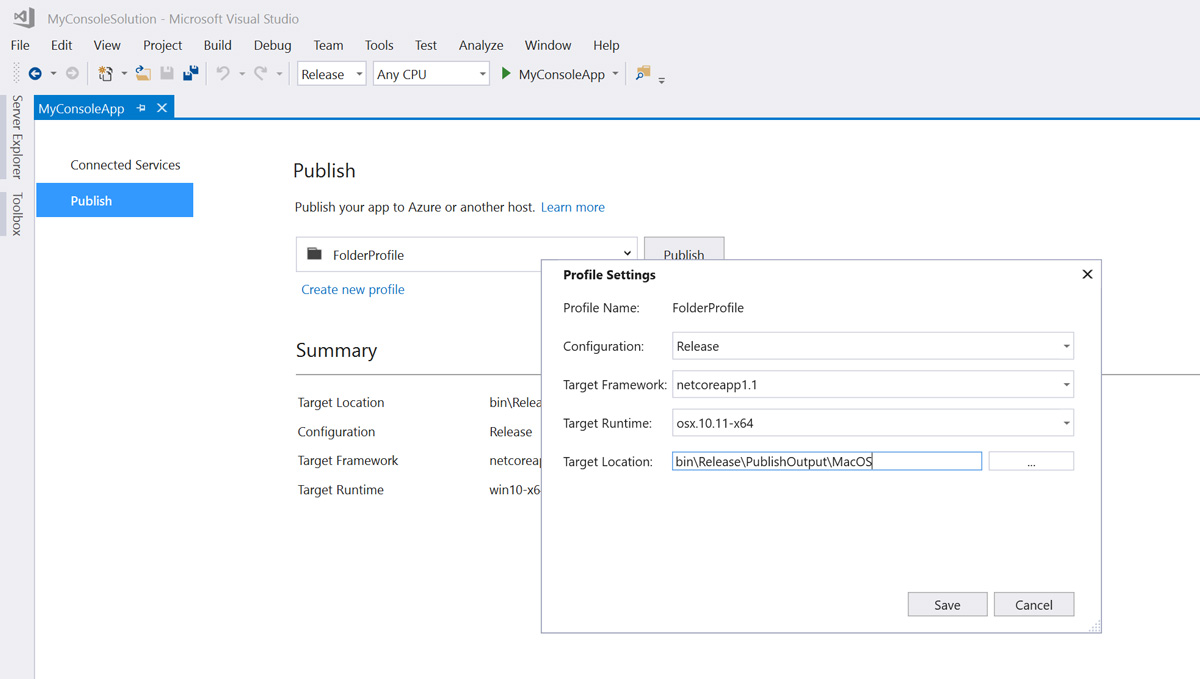
Step 6: In the Publish tab, you will see Profile Settings, select Target Runtime, specify a folder and press save. Then Publish. Repeat the step for all the 3 Platforms we are targeting.
You can try running the Windows 10 binaries from the folder (bin\Release\PublishOutput\Win10) we selected for that platform.
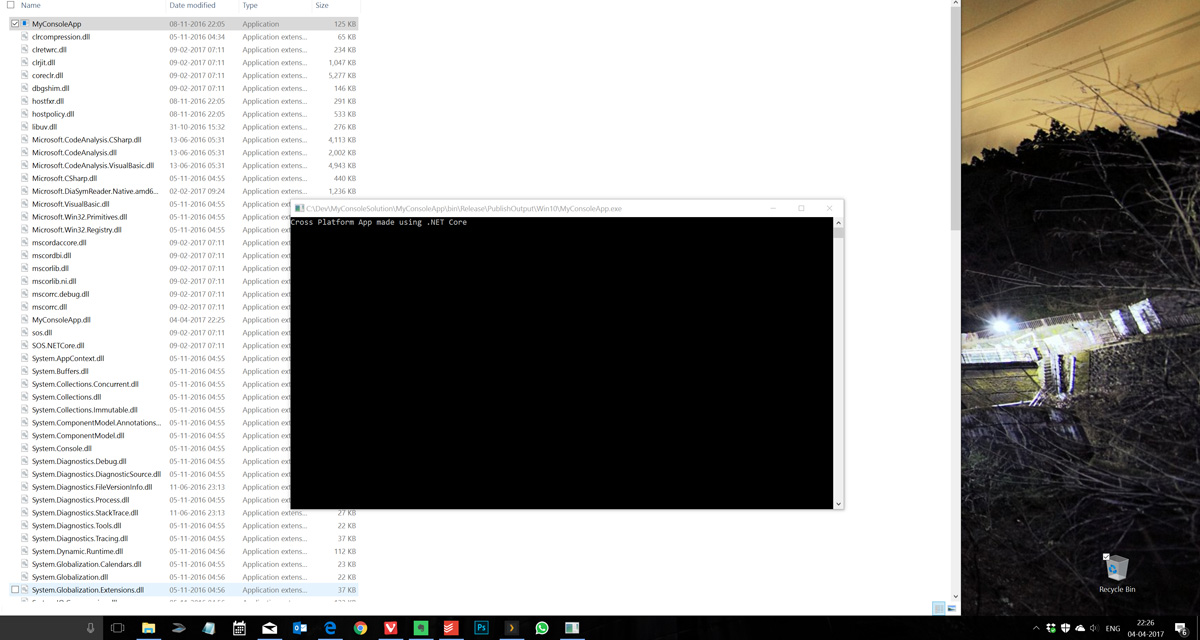
Step 7: Execute the app in Windows 10. The PC need not have .NET core available as this is a self contained package.
Copy the Mac OS binaries to a Mac OS and execute the application (MyConsoleApp) file from the folder. Note, the Mac machine doesn’t need to have .NET core installed as this package of about 53MB in size contains a self-contained version of .NET Core bundled. From terminal, you need to give Execute rights to the application. Repeat the same steps for Ubuntu OS, including the chmod command.
sudo chmod +x ./MyConsoleApp
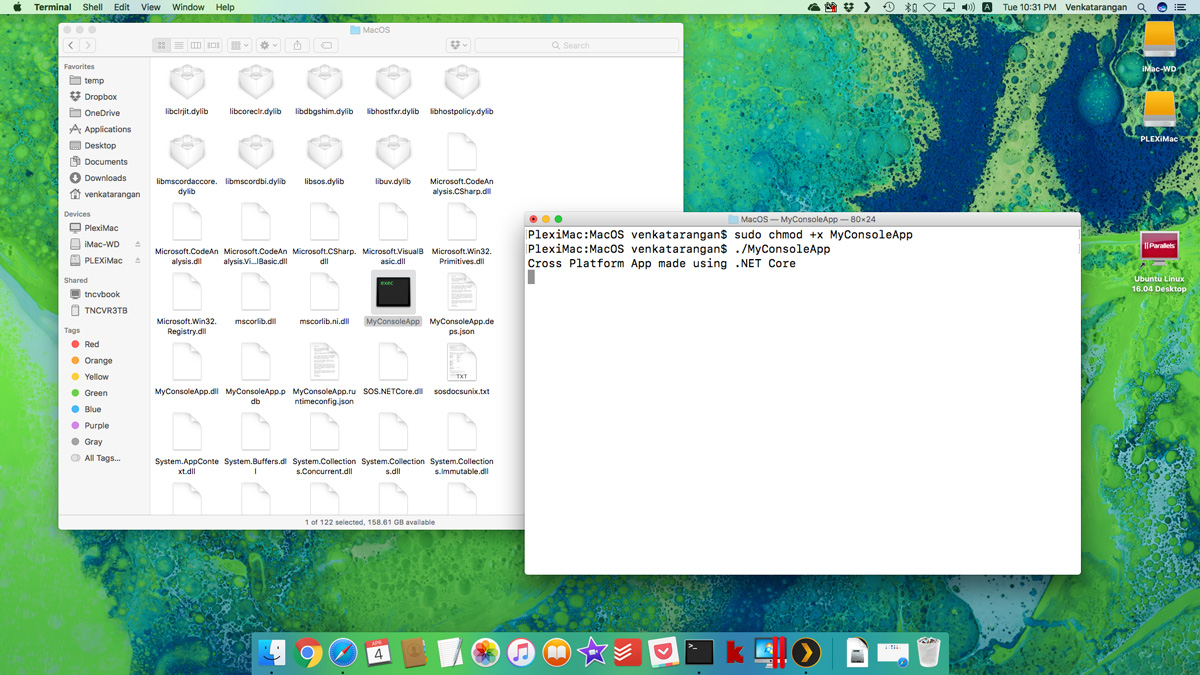
Step 8: Copy the Publish folder to a Mac OS and execute the app in OS X.
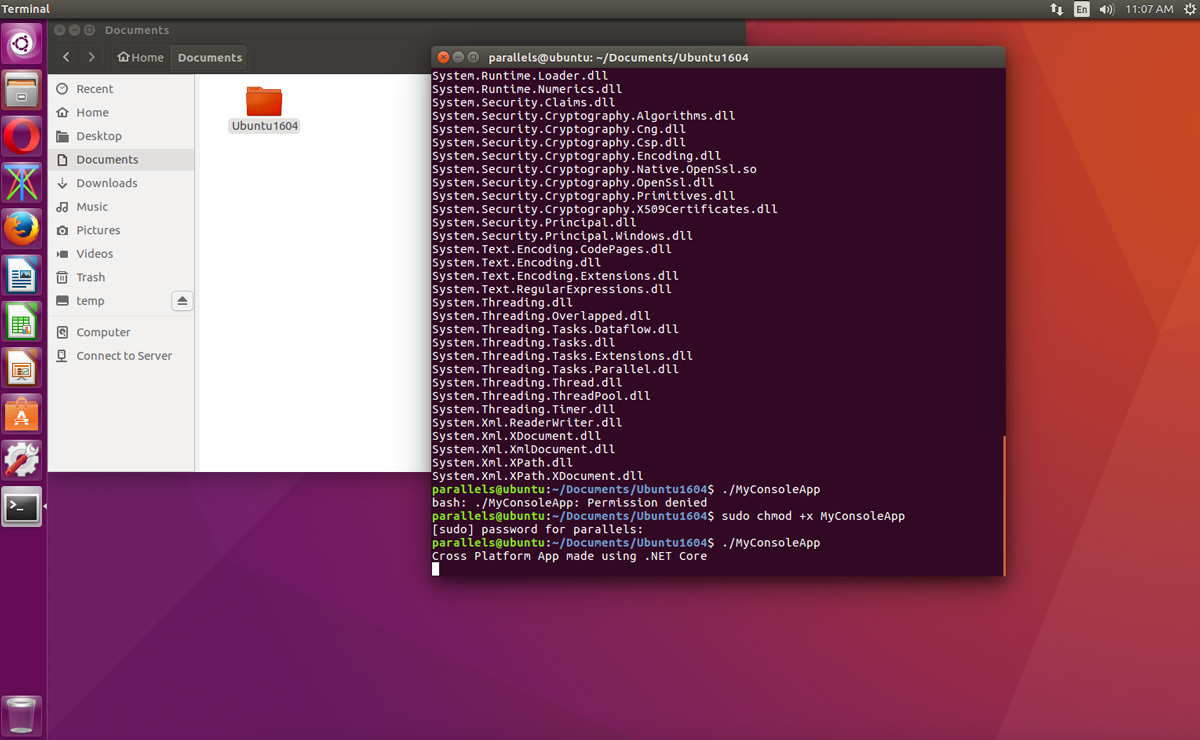
Step 9: Copy the Publish folder to a Ubuntu PC and execute the app in Linux OS. Remember to chmod +x
That’s all. As you have seen developing a multi-platform console app with .NET Core & Visual Studio 2017 is super easy.